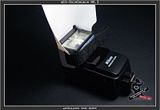
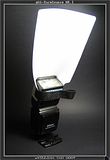
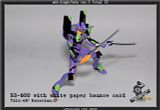
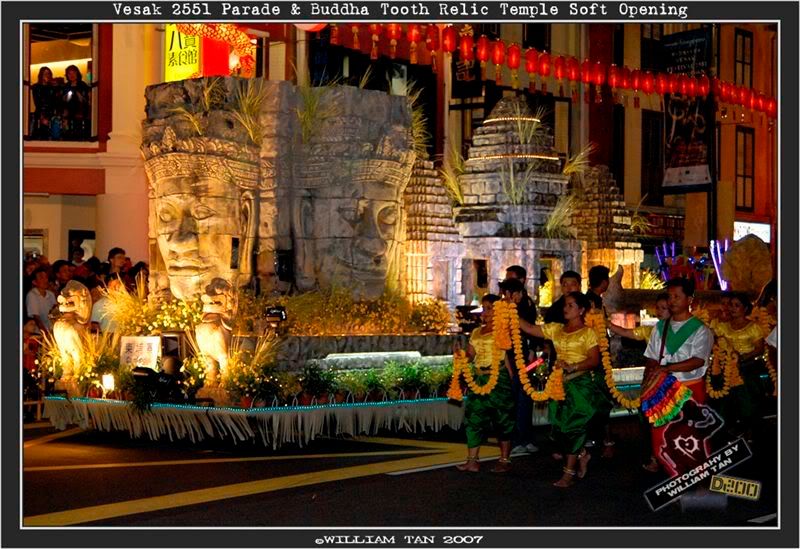
After I made myself a LightTube ver.1 for my SB600, I mentioned that it is sometimes hard to bounce the flash off the ceiling, especially when one is outdoors. Hence, I made the LightTube ver.1 to diffuse the harsh direct flash in omni-directions. However, an omni-directional diffuser will only prove useful when at close distances. At longer distances, it is necessary to still provide a slightly concentrated directional but less harsh flash. Hence, a bounce card is important here. In Trial II, when the ceiling was too high, I had to use a bounce card instead. In the recent Vesak 2551 Float Parade event, I utilized a bounce card to provide my lighting for my shots up to 60-70M distances. So I decided to make myself a proper and more durable bounce card to substitute the earlier prototype, which has been discarded as a piece of 'kiam chye' (preserved vegetable, due to its soggy crumpled state). There are many DIY bounce card tutorials available, such as the famous ABetterBounceCard.
With some simple materials that one can get cheaply from your neighbourhood bookstore or DIY store, one can make a similar bounce card. I followed the blueprint (not shown) of the earlier prototype bounce card and get cracking. Basically, I had all the materials salvaged from unwanted things that were intended for recycling. So my bounce card is ZERO COST. Within 1 hour or so, the first version of bounce card is born, mbb-SureBounce MK.I (abbreviated as SBMKI). The origin of the name came about from the model name of my flash strobe, Nikon SB-600. I have retained the 'SB' though I am not sure what it meant. I have wanted to call it SureBounce-600, but since my bounce card fits other models other than SB-600 as well, I shall leave out the suffix.
Making the SureBounce MK.I
©mybearbrick 2007
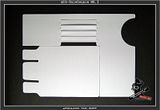
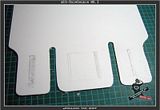
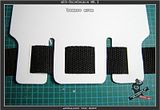
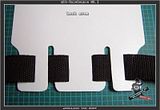
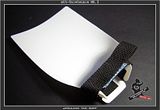
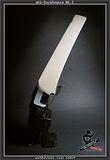
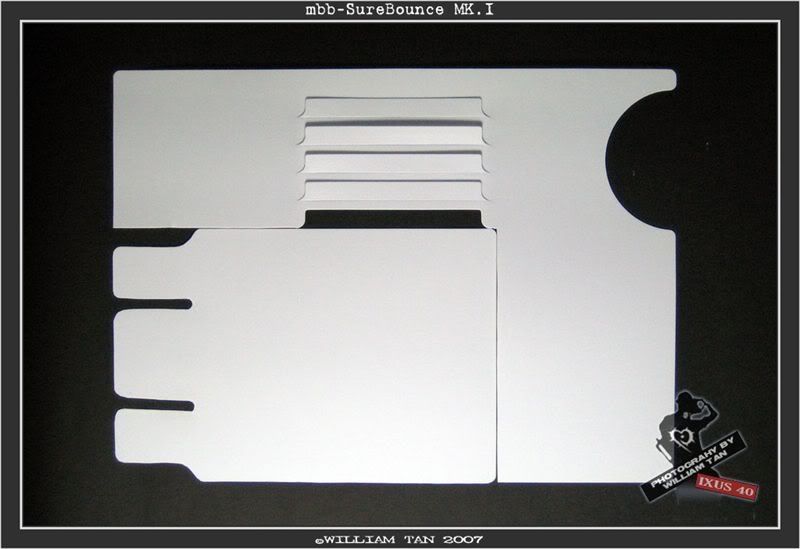
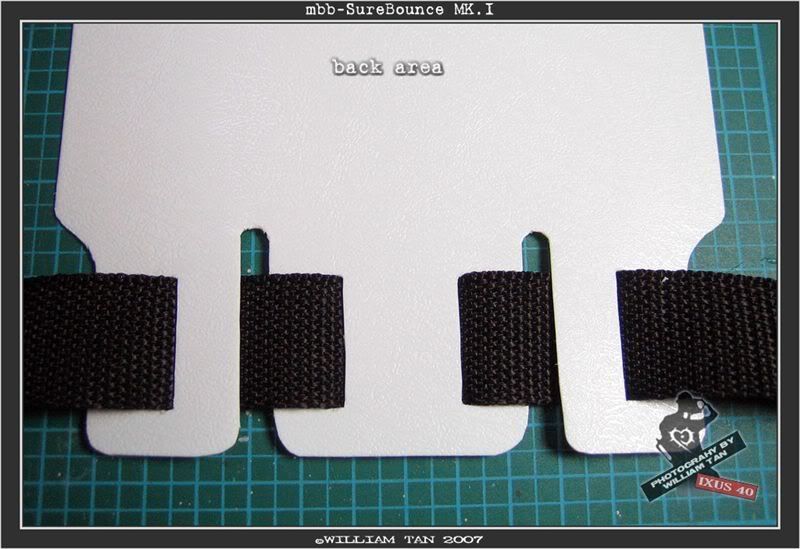
1. Getting the material ready. The white polypropylene card came as a backing board for a pack of binders from my neighbourhood bookstore. Similar 0.3mm thick polypropylene can be purchased from arts & carfts shops. Any thicker cards will make it hard to flex and it needs to flex without snapping (hence acrylic was not used). After which, I just cut accordingly to my blueprint (not shown). The design is made like this because the 2 intervals allows the card to flex easily, allowing the bounce card to curve slightly a the top to concentrate the light from straying to the sides. Physics!

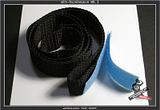
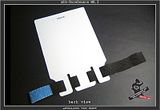
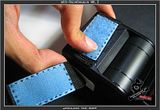
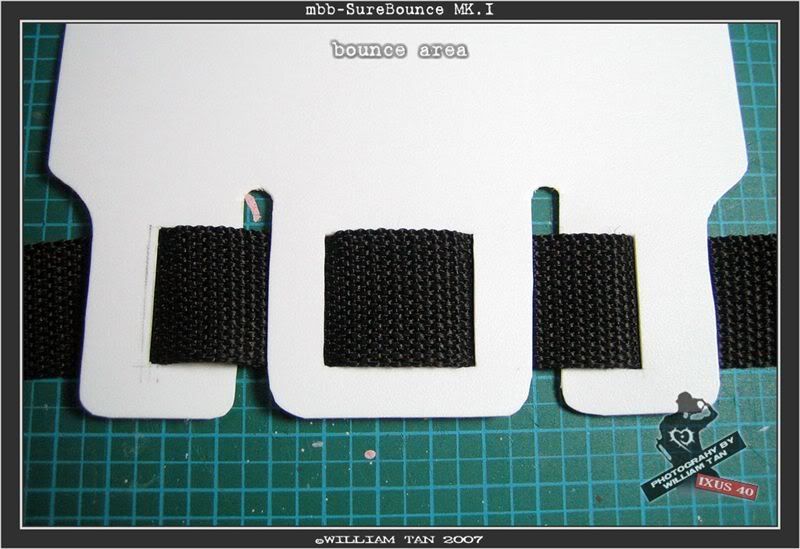
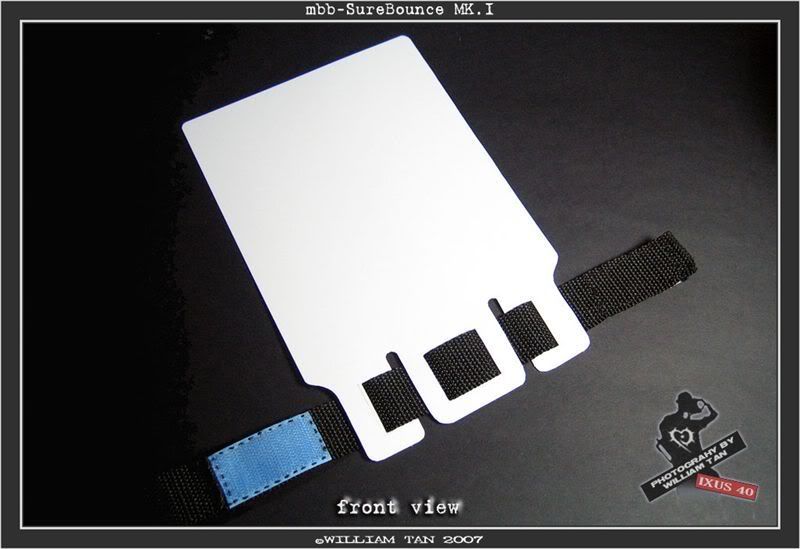
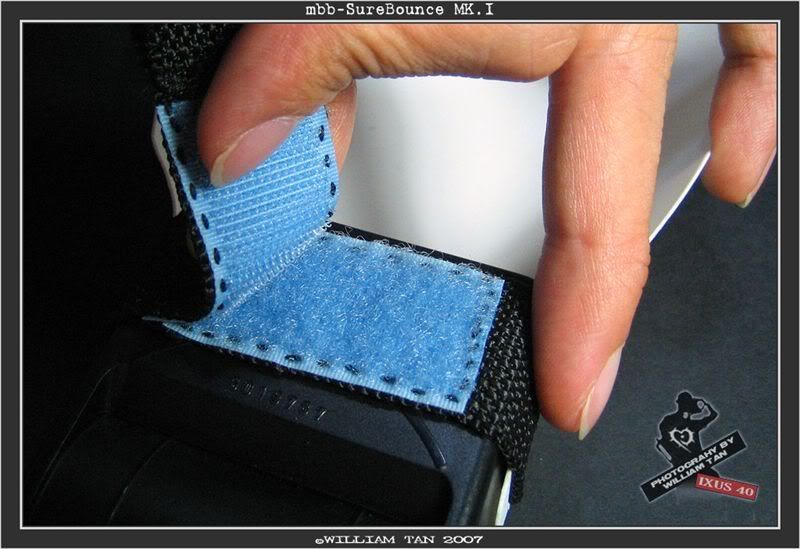
2. Get the right length of a strap and a strip of velcro. I got my strap from a worn out free sling bag from some event. Velcro is definitely useful in many circumstances. I keep a length at home, just in case I need them.
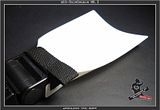
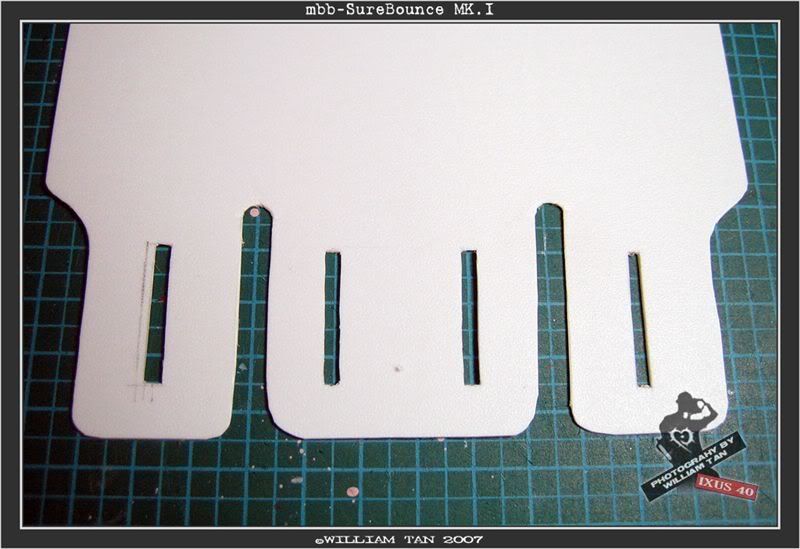
3. Mark out the slits that need to be cut in order for the strap to go through. The height of the slits matches the width of the strap.
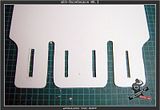
4. Run the strap through the slits to make sure they fit nicely. avoid any slack. The way that I have passed the strap through is after a few considerations of the physics. Alternative ways to run the strap through, will not make the card any more secure.
5. Here comes the tedious process. I manually stitched the velcro onto the strap. It took me close to an hour to get it done. Wear-&-tear is taken into consideration,hence I used double threading, so that the velcro will withstand the constant usage without having to rip off from the strap. The length of the strap and position of the velcro is crucial here; I had to constantly refer back to my SB-600 to make sure I got the right fit.

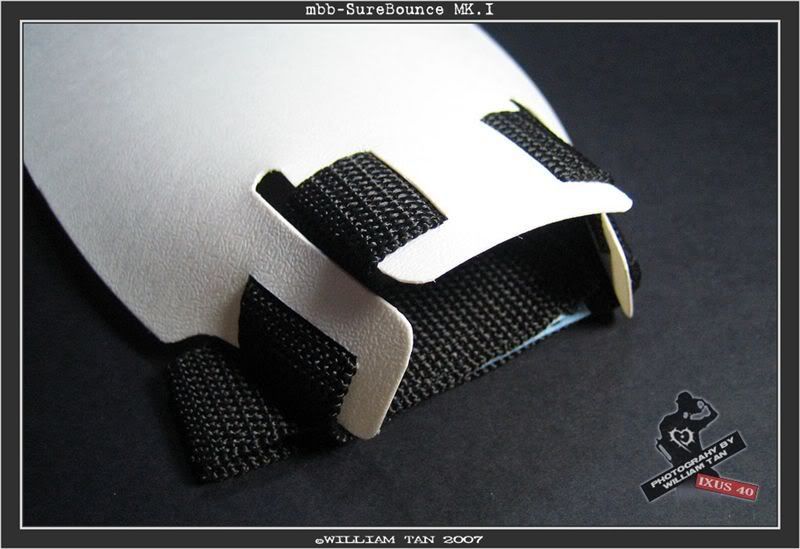
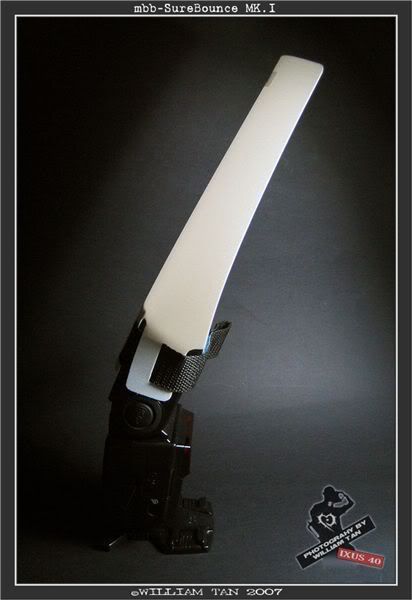
6. Testing the flex.
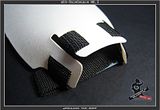
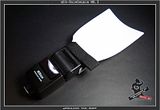
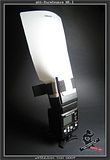
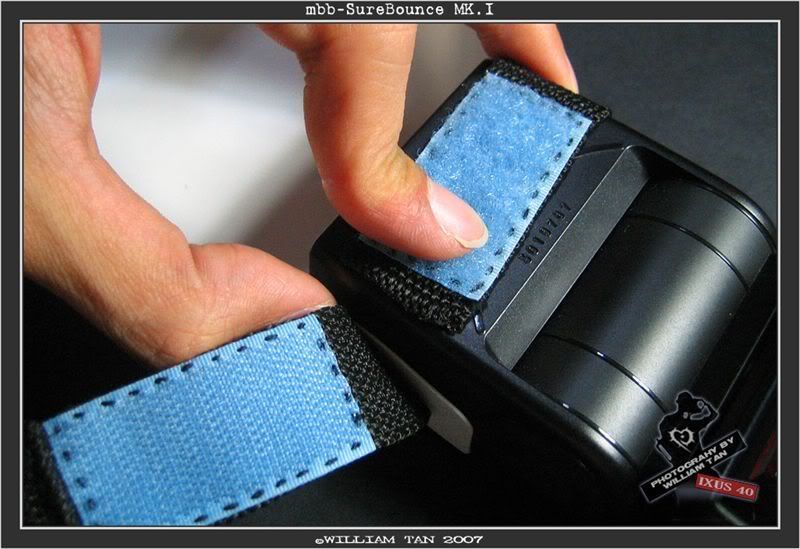
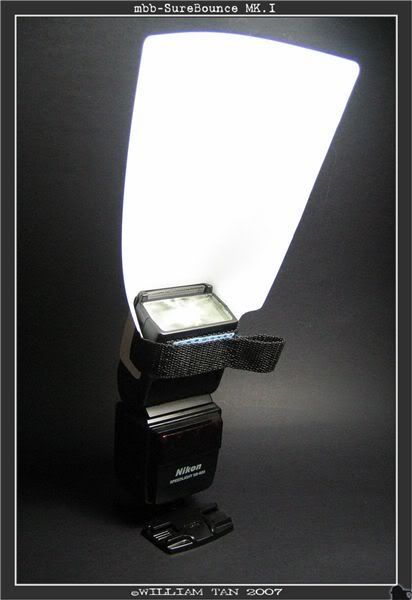
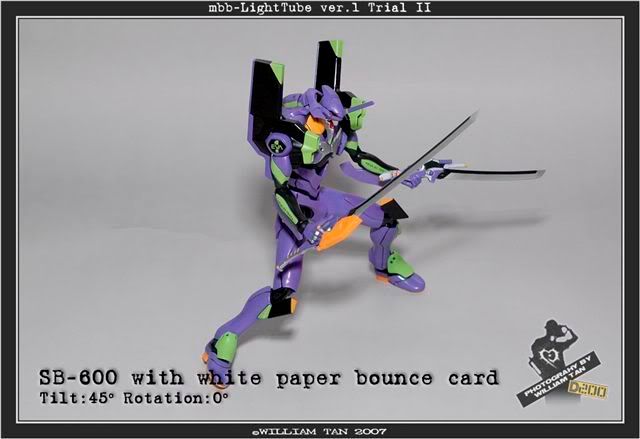
7. Trying it out on the SB-600. Job done!

SureBounce MK.Ia design and construction by mybearbrick ©mybearbrick 2007
THE VERDICT
OUTDOOR PHOTOGRAPHY


TOY PHOTOGRAPHY
technorati tags
With some simple materials that one can get cheaply from your neighbourhood bookstore or DIY store, one can make a similar bounce card. I followed the blueprint (not shown) of the earlier prototype bounce card and get cracking. Basically, I had all the materials salvaged from unwanted things that were intended for recycling. So my bounce card is ZERO COST. Within 1 hour or so, the first version of bounce card is born, mbb-SureBounce MK.I (abbreviated as SBMKI). The origin of the name came about from the model name of my flash strobe, Nikon SB-600. I have retained the 'SB' though I am not sure what it meant. I have wanted to call it SureBounce-600, but since my bounce card fits other models other than SB-600 as well, I shall leave out the suffix.
Making the SureBounce MK.I
©mybearbrick 2007
1. Getting the material ready. The white polypropylene card came as a backing board for a pack of binders from my neighbourhood bookstore. Similar 0.3mm thick polypropylene can be purchased from arts & carfts shops. Any thicker cards will make it hard to flex and it needs to flex without snapping (hence acrylic was not used). After which, I just cut accordingly to my blueprint (not shown). The design is made like this because the 2 intervals allows the card to flex easily, allowing the bounce card to curve slightly a the top to concentrate the light from straying to the sides. Physics!

2. Get the right length of a strap and a strip of velcro. I got my strap from a worn out free sling bag from some event. Velcro is definitely useful in many circumstances. I keep a length at home, just in case I need them.

3. Mark out the slits that need to be cut in order for the strap to go through. The height of the slits matches the width of the strap.

4. Run the strap through the slits to make sure they fit nicely. avoid any slack. The way that I have passed the strap through is after a few considerations of the physics. Alternative ways to run the strap through, will not make the card any more secure.
5. Here comes the tedious process. I manually stitched the velcro onto the strap. It took me close to an hour to get it done. Wear-&-tear is taken into consideration,hence I used double threading, so that the velcro will withstand the constant usage without having to rip off from the strap. The length of the strap and position of the velcro is crucial here; I had to constantly refer back to my SB-600 to make sure I got the right fit.

6. Testing the flex.

7. Trying it out on the SB-600. Job done!
SureBounce MK.I


THE VERDICT
I have not conducted a trial on the SBMKI. Howver, you can expected similar results like these, as produced by the prototype. Keep watching my blog from updates of the capabilities of the SureBounce MK.I.
OUTDOOR PHOTOGRAPHY

TOY PHOTOGRAPHY
technorati tags
Comments